Bundle Pricing Strategy: Maximize Crowdfunding Revenue
Unlock success with a powerful bundle pricing strategy for Kickstarter & Indiegogo. Maximize revenue, optimize pledges, and track key metrics.
Unlock success with a powerful bundle pricing strategy for Kickstarter & Indiegogo. Maximize revenue, optimize pledges, and track key metrics.
Your campaign funded. Backers are celebrating, comments are still active, and your inbox is filling with the same question in different forms: “Can I add one more thing?”
That's the moment where a lot of creators leave money on the table. They treat the pledge manager like an admin step instead of a revenue step. In tabletop, that usually means a core game with a few loose expansions. In hardware, it often means a device, a case, and maybe a spare accessory listed one by one with no logic behind the offer.
A solid bundle pricing strategy fixes that. It gives backers a simpler choice, raises the value of each order, and helps you control what gets bought together. In crowdfunding, that matters more than it does in normal e-commerce because your margins, fulfillment costs, and backer expectations are tighter.
The difference is execution. Generic retail advice doesn't go far enough for Kickstarter and Indiegogo creators. Post-campaign bundles have to account for manufacturing cost, shipping complexity, and the fact that a backer has already committed once. If you want more revenue without creating support headaches, your bundle has to be useful, profitable, and easy to buy.
Two weeks after a campaign closes, the pattern is easy to spot. Backers who were happy to pledge once start hesitating over a page full of single-item add-ons. Revenue stalls, support questions rise, and the pledge manager turns into a catalog instead of a buying path.
Bundling fixes that after funding because it matches how backers behave in a post-campaign checkout. They are not browsing the way a normal store customer does. They are trying to finish their order, avoid missing something important, and feel confident they picked the right version. A good bundle shortens that decision.

That matters more in crowdfunding than in standard ecommerce because the constraints are tighter. Margin is already mapped against production. Shipping can change based on weight, carton count, or battery rules. One messy add-on structure can create packing errors, refund requests, and angry comments right when you need clean data for fulfillment.
In retail, bundles often sit on top of an existing store. In crowdfunding, the bundle usually is the offer.
A tabletop creator might finish a campaign with a base game, upgraded tokens, a neoprene mat, and a storage insert. If those items sit in PledgeBox as separate checkboxes, backers have to build the right package themselves. If the same set appears as a “Complete Table Bundle” for players who want the full play experience, the choice gets easier and the order value usually rises with less friction.
The same pattern shows up in hardware. A device, travel case, replacement cable, and mounting accessory often sell better as a use-case bundle than as four isolated upgrades. “Starter Kit” and “Travel Kit” are clearer than a long accessory grid, especially when compatibility matters and backers do not want to guess.
One rule holds up across both categories. Backers buy bundles that remove uncertainty.
There is also an operational gain that creators often miss. Repeated item combinations are easier to forecast, easier to pick and pack, and easier to explain in support replies. For campaigns with lots of SKUs, that alone can justify building bundles before surveys go live.
I usually treat the pledge manager as the second revenue window of the campaign, not the cleanup step after it. That is why bundling works so well in post-campaign tools like PledgeBox. You can guide backers toward higher-value combinations without changing the original campaign page, and you can do it in a way that keeps fulfillment under control.
If your add-ons are still listed one by one, start by reviewing the buying patterns behind a high-revenue add-on item strategy for crowdfunding campaigns. The goal is simple. Sell sets that make the backer's decision easier and your operation cleaner.
A backer opens your pledge manager, sees twelve add-ons, and stalls. Then they see a clear bundle called “Gameplay Upgrade” or “Travel Kit” and decide in seconds. That is the standard to aim for in post-campaign bundling.
Creators usually miss because they build bundles around internal pressure. Leftover stock. A weak accessory. A stretch goal that looked better on the campaign page than it does in the cart. Backers spot that fast, especially in crowdfunding, where they already know they are funding a project with real production constraints. In PledgeBox, the strongest bundles feel like a better version of the pledge they already wanted.

Use pure bundles when the set should be bought as one decision.
In tabletop, that might be:
These work best when the value is the complete experience. Backers are not trying to assemble their own setup. They want the version that is ready for game night.
Use mixed bundles when the base product still sells well alone, but a defined add-on set improves it.
In hardware, common examples include:
This format matters in crowdfunding because some backers want the cheapest entry point, while others want a setup that is usable on day one. Mixed bundles let you serve both groups without cluttering the pledge manager with too many separate decisions.
The easiest way to choose a bundle is to ask what job the backer is trying to get done.
For tabletop, the jobs are usually obvious. Better play. Better storage. Better table presence. A strong bundle might be Core Game + First Expansion + Deluxe Tokens because each item improves the actual session. A weak bundle is Core Game + T-shirt + old promo pack because it mixes play content with extras that do not belong in the same buying decision.
For hardware, the pattern is similar. A strong bundle is Device + Protective Case + Setup Accessory. That says, “You can use this properly and keep it safe.” A weak one is Device + branded sticker pack + low-relevance spare part. That says, “We needed to move more items.”
Backers do not want to solve your catalog problems. They want a package that fits how they plan to use the product.
Post-campaign buyers are different from storefront buyers. They already backed, they may have forgotten some details, and many are trying to finish their survey quickly. That changes how bundles should be defined.
Use names that answer the use case right away:
Avoid vague labels like “Bundle A” or “Premium Plus.” Those create support questions and slow the purchase down.
I also keep the item count under control. Three to five products is usually enough. Once a bundle gets too large, the backer has to audit it line by line, and conversion drops because the offer feels harder to evaluate.
Run each bundle through these questions before it goes live:
Is the hero product obvious
The backer should know the main item at a glance.
Does every added item improve use, ownership, or the core experience
If one item feels forced, cut it.
Can a first-time backer understand the value in a few seconds
If the explanation needs too much copy, the bundle is not clear enough.
Is the bundle built for a real backer type
New player, collector, traveler, tinkerer, painter, retailer. Name the user.
Will this make fulfillment simpler or messier
In crowdfunding, a bundle that sells well but creates packing errors is still a bad decision.
If you need to tighten the add-on lineup before packaging items together, review this guide to a high-revenue add-on item strategy for crowdfunding campaigns.
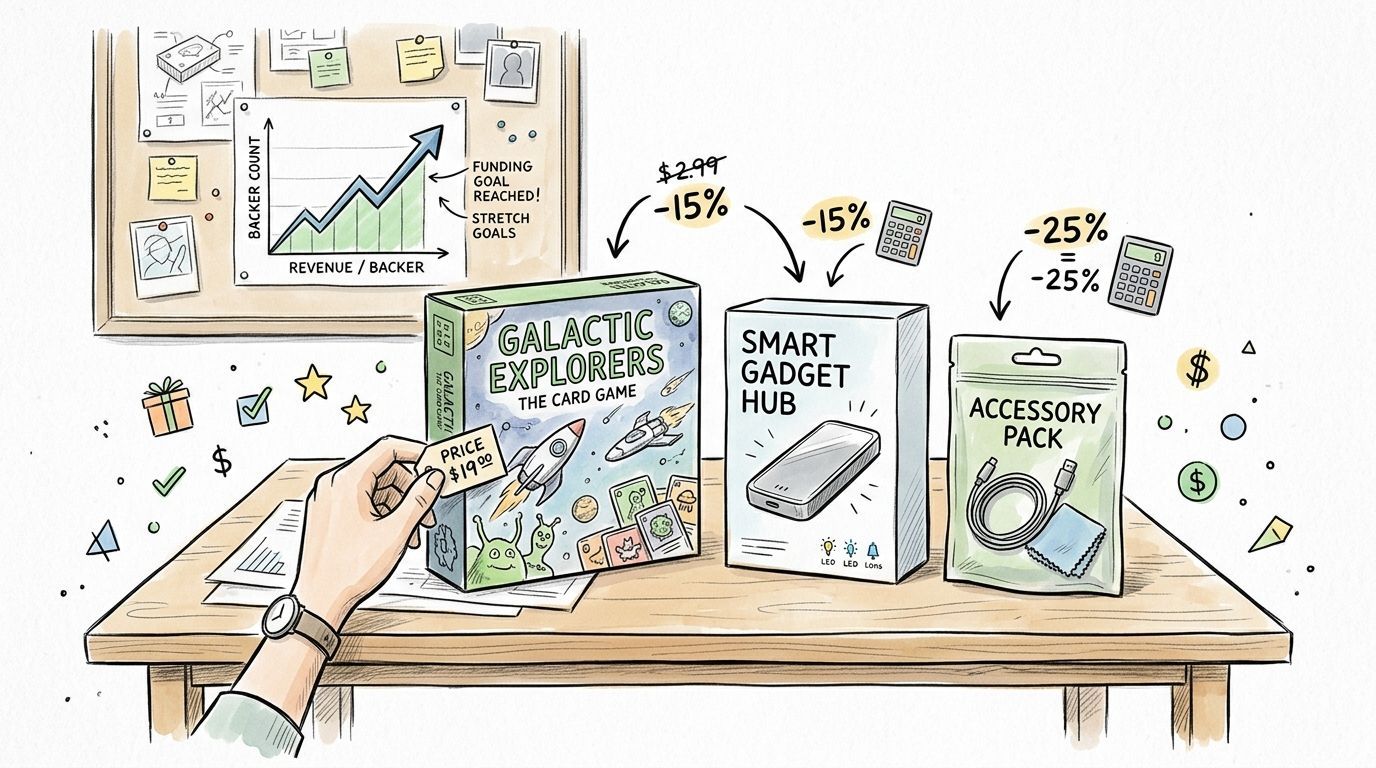
A campaign funds. The pledge manager opens. Backers start adding extras, and the bundle that looked great on the campaign page suddenly has to survive manufacturing, pick-and-pack labor, freight, payment fees, and replacement risk. That is where bundle pricing usually breaks in crowdfunding.
The fix is simple in principle. Price bundles from the cost side first, then check whether the offer still feels strong to the backer. In post-campaign sales, especially inside PledgeBox, that discipline matters more than it does in standard ecommerce because your costs are less flexible and your fulfillment mistakes are more expensive.
A flat discount rule is too blunt for crowdfunding. A tabletop creator can often absorb a better discount on acrylic tokens or neoprene mats than on a core box with heavy components. A hardware team may have almost no room on the main device but healthy margin on mounts, cables, or cases.
Start with four numbers for every bundle:
Standalone selling price total
Add the individual prices the backer would pay outside the bundle.
Fully loaded bundle cost
Include unit cost, pick-and-pack complexity, packaging changes, freight impact, payment processing, and a buffer for damaged or missing items.
Minimum acceptable contribution margin
Set the floor that still leaves enough room for your project risk.
Backer-facing discount
Apply the discount only after the first three numbers make sense.
That order matters.
Use this check before any bundle goes live:
Bundle Price = Fully Loaded Cost / (1 - Target Margin)
Then compare that number against your standalone selling price total.
If the resulting bundle price barely beats the item-by-item total, the bundle is weak. If it requires a deep discount to look attractive, your cost structure is wrong for that combination. Change the contents before you change the margin target.
Say a board game creator wants to sell an All-In Gameplay Bundle with:
The individual prices total $140.
Now calculate the fully loaded cost:
Fully loaded cost: $72
If the creator needs a 35% contribution margin to cover overhead and project risk:
$72 / (1 - 0.35) = $110.77
Round to a backer-friendly number. The bundle lands at $109 or $110 depending on the rest of the pricing grid.
That creates a real discount from the $140 item total without putting the campaign in a weak margin position.
Hardware bundles fail for a different reason. The main unit often carries tight margin, while accessories carry the profit. If you bundle the device, travel case, spare battery, and mount, do not assume each item behaves the same way in the math.
I usually split hardware bundles into two checks:
If the main device is already tight, the accessories need to carry enough contribution to justify the discount. Otherwise you create a bundle that grows revenue but shrinks cash available for production.
This is the same logic teams use when they raise average order value after the campaign. PledgeBox covers the mechanics well in its guide to increasing average order value in crowdfunding.
The common mistakes are predictable:
Using campaign-era COGS instead of current landed cost
Supplier changes, freight swings, and packaging revisions often happen after funding.
Ignoring fulfillment labor
A bundle with four SKUs is not priced like one with two SKUs, even if the item cost looks similar.
Forcing a discount percentage
Backers do not need every bundle to be 15% off. They need the offer to feel clear and fair.
Using fake anchor prices
Inflated standalone prices create support tickets and weaken trust.
Forgetting shipping thresholds
One extra item can push the parcel into a more expensive band and erase the margin you thought you had.
A bundle should earn its place on the upsell page.
Before building the offer in PledgeBox, check these three questions:
Does the bundle still work if replacement rate runs higher than expected?
This matters for electronics, painted minis, glass parts, and anything fragile.
Does the bundle create a simpler cart decision than buying separately?
If the pricing gain is tiny, let backers buy the items one by one.
Would you still offer this bundle if freight costs rise before fulfillment?
If the answer is no, the buffer is too thin.
Teams that want custom bundle logic across post-campaign systems often pair pledge management with specialized ecommerce workflows. For that kind of setup, Yassine Malti's Shopify app development is a relevant reference point.
Good bundle pricing is not about finding the biggest discount backers will accept. It is about protecting margin while making the post-campaign purchase feel easy, credible, and worth adding to the pledge.
A campaign can fund well and still leave money on the table in the pledge manager.
I see this happen with both tabletop and hardware projects. The team builds strong add-ons, then drops backers into a survey that feels like a parts list. Bundles stop working when the setup turns a buying decision into admin work. PledgeBox gives creators more control over how bundles are presented, which matters after the campaign ends, when backers are deciding whether to upgrade, add accessories, or stay with the base reward.

Kickstarter's native post-campaign flow is closer to a fixed marketplace experience. PledgeBox works more like Shopify for crowdfunding. You get a branded environment for surveys, shipping collection, tax handling, add-ons, and late backer orders. That control changes bundle performance because merchandising affects take-up just as much as price.
Bundles need presentation, order, and context.
A backer should understand three things within seconds: what the bundle includes, who it is for, and why it is easier than building the same cart manually. If the page looks generic or crowded, even a well-priced offer can stall.
That is also why some teams pair pledge management with custom commerce workflows. If you want to understand how merchants structure buying paths around behavior instead of just checkout logic, Yassine Malti's Shopify app development is a useful reference.
Start from the funded pledge level the backer already chose.
For a board game, that usually means the base game or core pledge. Good bundle upgrades add obvious value from there: sleeves plus storage, an expansion set, a playmat, or a collector box. For hardware, the core is the device itself, then the practical add-ons around it: spare battery, mounting kit, protective case, cable pack, or setup accessories.
Many creators get sloppy. They mix unrelated extras into one bundle because the items are in stock or have high margin. Backers notice. A bundle built around actual use gets stronger conversion than a bundle built around warehouse convenience.
Three bundle paths usually cover the job:
The names matter less than the logic. Each option should map to a clear buyer type.
In tabletop, Starter might be base game plus sleeves. Deluxe might add the first expansion and storage. All-In can include every gameplay expansion and premium accessory. In hardware, Starter could be the device plus a protective case, Deluxe adds charging and mounting, and All-In includes spares or advanced accessories for regular use.
Keep descriptions short and concrete. Long copy slows survey completion.
A strong bundle description does four jobs fast:
For example, a tabletop bundle might say: “Base game, sleeves, and storage box for groups planning regular play.” A hardware bundle might say: “Device, case, and mount for backers who want a ready-to-install setup.”
That is enough.
Sequence matters more than many creators expect.
The cleanest flow is:
That order keeps the bundle framed as the default upgrade path. If individual add-ons appear first, backers start comparing line items instead of evaluating the curated offer. In practice, that lowers bundle adoption and creates more abandoned surveys, especially on campaigns with lots of accessories.
I also recommend limiting the first screen to one primary bundle recommendation per pledge level. A backer who bought a skirmish game should not see the same first upsell as a backer who pledged for paint sets. A backer who funded a core hardware unit should not land on a premium accessory pack before seeing the practical setup bundle.
Crowdfunding bundles behave differently from normal ecommerce bundles because fulfillment is still ahead of you.
That means setup needs to account for locked pledge levels, region-based shipping, tax collection, and partial availability. If an expansion ships later than the base game, say so in the bundle description or split it into a separate offer. If a battery pack cannot ship to every country, do not bury that restriction in a support reply later. If a large board game bundle changes carton size, make sure the shipping rule is already configured before the survey goes live.
The best bundle setup is boring behind the scenes. It works cleanly when thousands of backers move through the survey.
For creators refining offer placement and post-campaign merchandising, this guide on making the most of PledgeBox's upsell features is a useful practical reference.
Your first bundle is a draft. Treat it that way.
Crowdfunding creators often assume the hard part is building the offer. It isn't. The hard part is finding the version that improves revenue without creating deadweight discounting. The strongest benchmark here is process, not instinct. Technical guidance recommends A/B testing three discount levels, such as 10%, 15%, and 20%, across micro-segments to find the sweet spot where revenue rises without hurting upsell opportunity.

A lot of creators only test product combinations. They should also test how aggressive the bundle feels.
Try variation by segment:
Technical analysis also warns against over-packaging. Offering more than five options can reduce conversion by 22% because of decision paralysis. In practical terms, that means your survey should feel curated, not crowded.
Tabletop and hardware creators run into difficulty when they keep adding “just one more” thing to increase perceived value, then end up with a bundle that asks the backer to process too much.
A better operating rule is simple:
If the backer starts wondering whether they need every included item, the bundle is too busy.
Smaller bundles often win because they ask for less mental work.
Optimization doesn't stop at conversion. It includes shipping and tax behavior too.
Check these before locking a bundle:
The best bundle pricing strategy is the one your backers understand, your warehouse can fulfill, and your finance sheet can still defend.
A bundle can look strong on launch week and still underperform once real backers move through the pledge manager. I have seen tabletop campaigns post a healthy jump in average order value, then lose the gain through support tickets, shipping corrections, and low-margin item mixes. Post-campaign tracking needs to catch that early.
Start with one question. Did the bundle create better revenue than the backer would have generated anyway?
In PledgeBox, that usually comes down to a small set of metrics you can review every few days during the survey window, then again after late pledges slow down.
Track these at the bundle level, not just across the whole campaign:
That last metric gets ignored too often. In hardware campaigns, a charger pack or accessory kit can sell well but still create costly support if compatibility is unclear. In tabletop, collector bundles often drive upgrades, but if backers keep asking whether expansions require the core box, the offer is not as strong as the revenue line suggests.
Do not treat all bundle buyers as one group.
Returning backers behave differently from first-time backers. Core fans may buy the “all-in” tabletop bundle because they already trust the project. Late backers often need a tighter offer, such as the base game plus one expansion or the device plus the two accessories with the highest use rate. If one bundle converts well only with your warmest audience, that matters. It may still be worth keeping, but it should not become the default template for the next campaign.
A simple cut of the data usually helps:
Strong bundle pricing in crowdfunding has to survive fulfillment.
If a bundle raises order value but increases address changes, package splits, warehouse exceptions, or tax cleanup, the offer needs work. I would rather keep a slightly smaller bundle that ships cleanly than force a higher-priced package that causes errors at scale. That trade-off shows up fast in post-campaign operations, especially for campaigns with many SKUs or regional fulfillment partners.
Use a simple decision rule:
Keep the bundle if it adds revenue, holds margin, and creates little confusion. Revise or remove it if one of those breaks.
The true payoff is not just this survey cycle. It is what you learn before the next launch.
If a tabletop “gameplay bundle” outperforms a large collector set, build future reward tiers around play value instead of quantity. If a hardware starter kit converts better than a premium pack with too many accessories, tighten the next offer and make the upgrade path clearer. Post-campaign bundle data is where pricing stops being a guess and becomes an operating system.
If you want a pledge manager built for this kind of post-campaign revenue work, PledgeBox gives creators a branded, Shopify-like environment for crowdfunding. It's free to send the backer survey, and it only charges 3% of upsell revenue if there's any. That makes it a practical setup for testing bundles, collecting shipping and tax, and turning post-campaign demand into structured add-on sales.
The All-in-One Toolkit to Launch, Manage & Scale Your Kickstarter / Indiegogo Campaign