Build Your Dream Deck With DIY Turntable Kits
Your definitive guide to building with DIY turntable kits. Learn to choose the right kit, assemble components, and calibrate for audiophile-grade sound.
Your definitive guide to building with DIY turntable kits. Learn to choose the right kit, assemble components, and calibrate for audiophile-grade sound.
Building a turntable from a kit isn't just another weekend project. It’s your ticket into the world of true high-fidelity analog sound. These kits give you a hands-on feel for how a turntable really works, letting you build something with premium audio quality for a fraction of what you'd pay for a pre-built model.
Going with DIY turntable kits is a choice that satisfies both the audiophile and the pragmatist in you. The most obvious win is the incredible value. You can put together a turntable that performs on par with high-end commercial decks, often saving hundreds of dollars in the process. This isn’t about cutting corners on quality, either—it’s about putting you in the driver’s seat, controlling every single component that shapes your sound.
This isn't just a niche hobby; it’s part of a much bigger vinyl revival. The global turntable market hit USD 318.87 million in 2023 and is on track to nearly double by 2031. A huge chunk of that growth comes from enthusiasts who swear by the authentic sound of belt-drive models—the very type you'll find in most kits between $100 and $500. You can dig deeper into the turntable market trends if you're curious.
Beyond the savings, building your own deck is an education. You’ll get to know exactly how each part works together to create that rich, warm sound vinyl is famous for.
When you assemble a kit, you'll get intimately familiar with the four pillars of turntable design. Each one has a specific job to do, and getting them right is what separates good sound from great sound.
By the time you're done, you won't just own a turntable—you'll understand it. That knowledge is gold. It means you can troubleshoot, upgrade, and fine-tune your setup for years, creating a listening experience that's truly yours.
Diving into the world of DIY turntable kits can feel a lot like digging through crates at a new record shop—exciting, but definitely a bit overwhelming. The key is to be honest with yourself about your skills, your budget, and what you really want out of the experience. Get this first step right, and you're on your way to a rewarding project instead of a box of confusing parts.
The vinyl market has absolutely exploded, growing into a USD 1.5 billion industry with a passionate community of builders. While you'll see a few big names, a huge part of the scene is made up of smaller shops and creators making incredible kits for every kind of enthusiast. You can actually dig into the turntable market data to see just how much it's grown.
This is often where new creators, especially those launching on crowdfunding sites, run into trouble—managing all their backers. They usually need a pledge manager to handle surveys and fulfillment. While some platforms can be pricey, PledgeBox is free to send the backer survey and only charges 3% of the upsell if there’s any.
A good way to think about it is that the Kickstarter pledge manager is like Amazon—a huge, one-size-fits-all marketplace. In contrast, the PledgeBox pledge manager is like Shopify, giving creators a specialized toolkit to manage their community and grow their project long after the campaign clock runs out.
Deciding on a kit really comes down to your comfort level with electronics and woodworking. To make it easier, I've broken down the main approaches to help you figure out which path is the right fit for your skills and goals.
Ultimately, there's no single "best" option—only the one that's best for you. An all-in-one kit is a fantastic way to learn the ropes, while a modular or from-scratch build is a journey that lets you craft a truly personal piece of audio gear.
If you're new to soldering irons or woodworking, an all-in-one kit is absolutely the way to go. These kits are designed to be as simple as possible. Everything you need is right there in the box—plinth, platter, tonearm, cartridge, the works.
Got a bit of experience under your belt, or a very specific sound you're chasing? A modular approach gives you the freedom to build your dream machine. This path lets you hand-pick every single component, from a specific brand of tonearm to a custom-milled wood plinth or a high-end cartridge.
A modular build is a journey of continuous improvement. You can start with a solid foundation and upgrade individual components over time, constantly refining your sound as your knowledge and budget grow.
This route definitely requires more research and patience. You'll need to double-check that all your chosen parts play nicely together, which means understanding things like tonearm mounting distances and platter bearing types. It's more of a challenge, for sure, but the reward is a piece of audio equipment that is 100% yours, tailored perfectly to your listening tastes.

A successful build starts long before you even open your DIY turntable kits. How you prepare your space is often what separates a smooth, enjoyable project from a frustrating ordeal. The goal here is to create a clean, organized, and well-lit environment where you can focus on the delicate assembly without any avoidable hiccups.
Think of your workspace as an operating room for your new turntable. A sturdy, level table is non-negotiable. You’ll need enough surface area to lay out all your components without stacking them on top of each other. Good lighting is just as crucial—an adjustable desk lamp will be your best friend when you're dealing with tiny screws and delicate wiring.
To keep everything straight, grab some magnetic trays or even just a few small containers to hold screws and parts as you unbox them. This one simple move can save you the massive headache of a lost screw rolling into oblivion. If you need some inspiration for keeping your project on track, check out these ideas for a DIY white board to map out your steps.
While every kit has its own quirks, a core set of tools will get you through most builds. Trust me on this: investing in quality tools doesn't just make the job easier; it prevents you from accidentally damaging your new turntable's components.
Here are the absolute must-haves:
Beyond the basics, a couple of extra tools can really elevate your build. A digital multimeter is invaluable for double-checking your electrical connections and troubleshooting, while a simple bubble level ensures your plinth and platter are perfectly horizontal—something that’s absolutely critical for proper playback.
With the right tools and an organized space, you’re setting yourself up for a confident and successful build. You'll be ready to tackle the assembly with precision, transforming that box of parts into a high-fidelity instrument you built yourself.
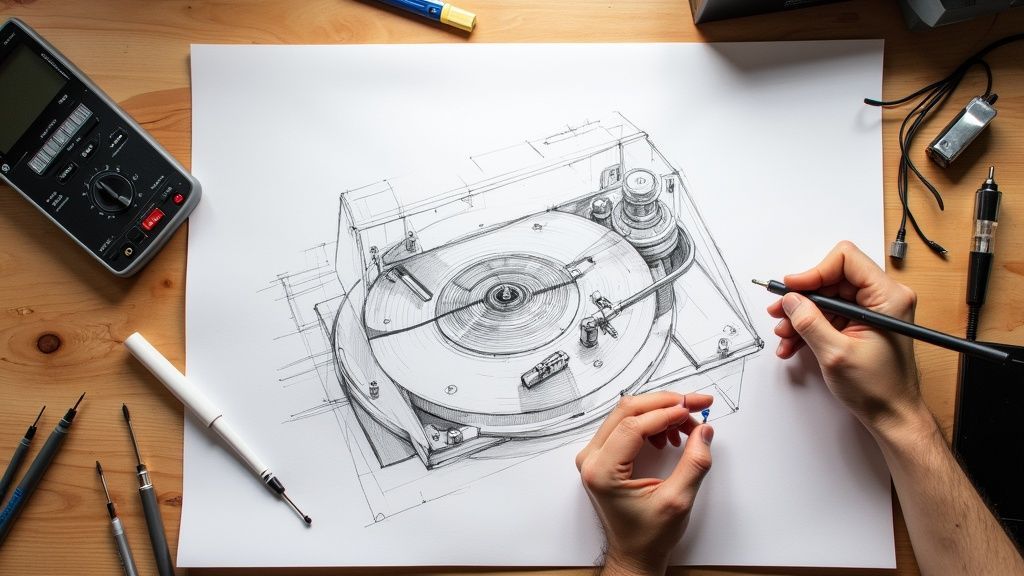
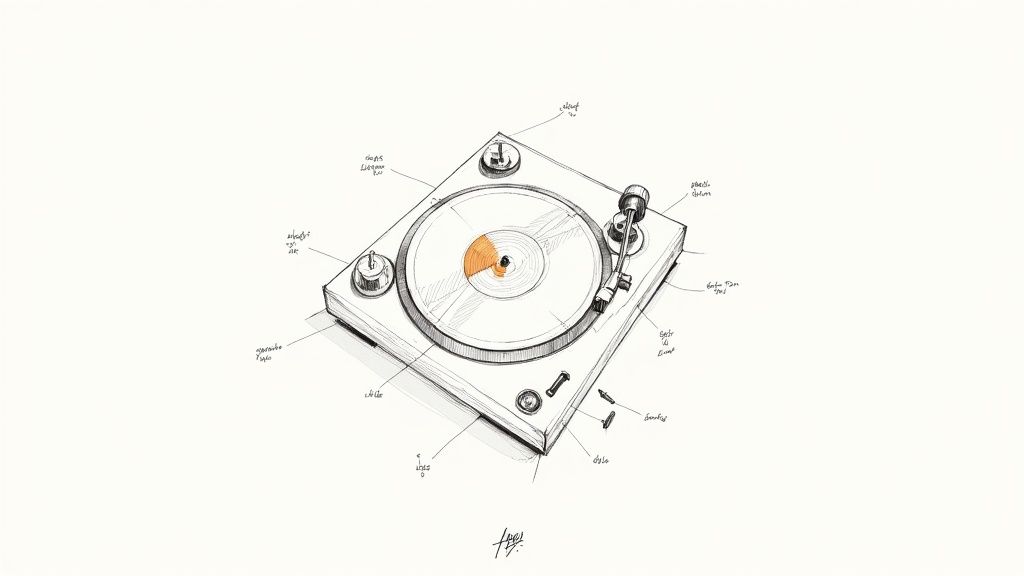
This is where the magic happens. Your DIY turntable kits are about to go from a collection of parts in a box to a genuine, high-fidelity instrument. We’re going to walk through the build, but I want to focus on the practical side of things—not just what to do, but why you're doing it. The goal is a turntable that doesn't just work, but sounds absolutely fantastic. No dense engineering jargon here, just straightforward guidance from one audio lover to another.
Your journey begins with the plinth. This is the foundation of your entire setup, much like the chassis of a performance car. Its whole job is to be a rock-solid, vibration-free platform for everything else. Before you even think about mounting a single component, grab a level and make sure the plinth is perfectly flat. Even a tiny tilt now will cause a cascade of problems later on.
With the plinth squared away, it’s time to install the motor and the platter bearing. These two are the heart of your turntable's drive system. How well you install them will directly affect your deck's rotational stability and how much unwanted noise makes its way to the stylus.
The motor is often the biggest culprit when it comes to unwanted vibrations. Most kits will give you rubber grommets or some kind of damping material for mounting it. Do not skip these. Their entire purpose is to isolate the motor's tiny vibrations from the plinth so they don't travel up to the platter and into your music. Take your time here. The motor should be secure, but don't crank down on the screws so hard that you crush the dampers—that defeats the whole purpose.
Next up is the platter bearing. This is a high-precision part, so treat it with respect. Make sure absolutely no dust or grit gets into the bearing well. A single speck of dirt in there can create friction and noise. Your kit will probably specify a certain type and amount of oil; use exactly what they recommend.
Pro Tip: When you're ready to seat the platter on the bearing spindle for the first time, lower it down slowly and evenly. If you just drop it on, you risk damaging the delicate thrust plate at the bottom of the well. That little plate is crucial for smooth, silent rotation.
This kind of careful, deliberate work in the early stages is what separates a good build from a great one. It’s the same discipline you’d see in other detailed projects. For instance, the patience required for a miniature city model kit is a perfect parallel—getting the foundation right makes all the difference.
Alright, now for what is easily the most critical—and delicate—part of the build: installing the tonearm and cartridge. The geometry of this setup is everything. It determines how accurately the stylus can trace the record groove, which directly impacts sound clarity, distortion, and channel balance. Get this right, and you're golden.
First, mount the tonearm base to the plinth exactly as the instructions show. Even a millimeter off in the pivot-to-spindle distance can make it impossible to align the cartridge correctly later. Precision is your friend here.
Once the arm is on, it's cartridge time. This requires a steady hand and a bit of patience.
With the big pieces in place, you can connect the ground wire and RCA cables from the tonearm to your phono preamp. Taking a moment to ensure every connection is clean and solid will save you from a world of hum and troubleshooting headaches down the line. You're now just one step away from spinning that first record on a turntable you built with your own hands.
Getting your DIY turntable kit assembled is a huge milestone, but the real magic happens during calibration. This is where you transform a collection of well-chosen parts into a precision instrument capable of delivering truly breathtaking sound. Honestly, these final adjustments are what separate a decent turntable from a genuinely great one.
The whole process is a journey in precision, starting with a solid plinth, moving to the platter, and finishing with the tonearm.
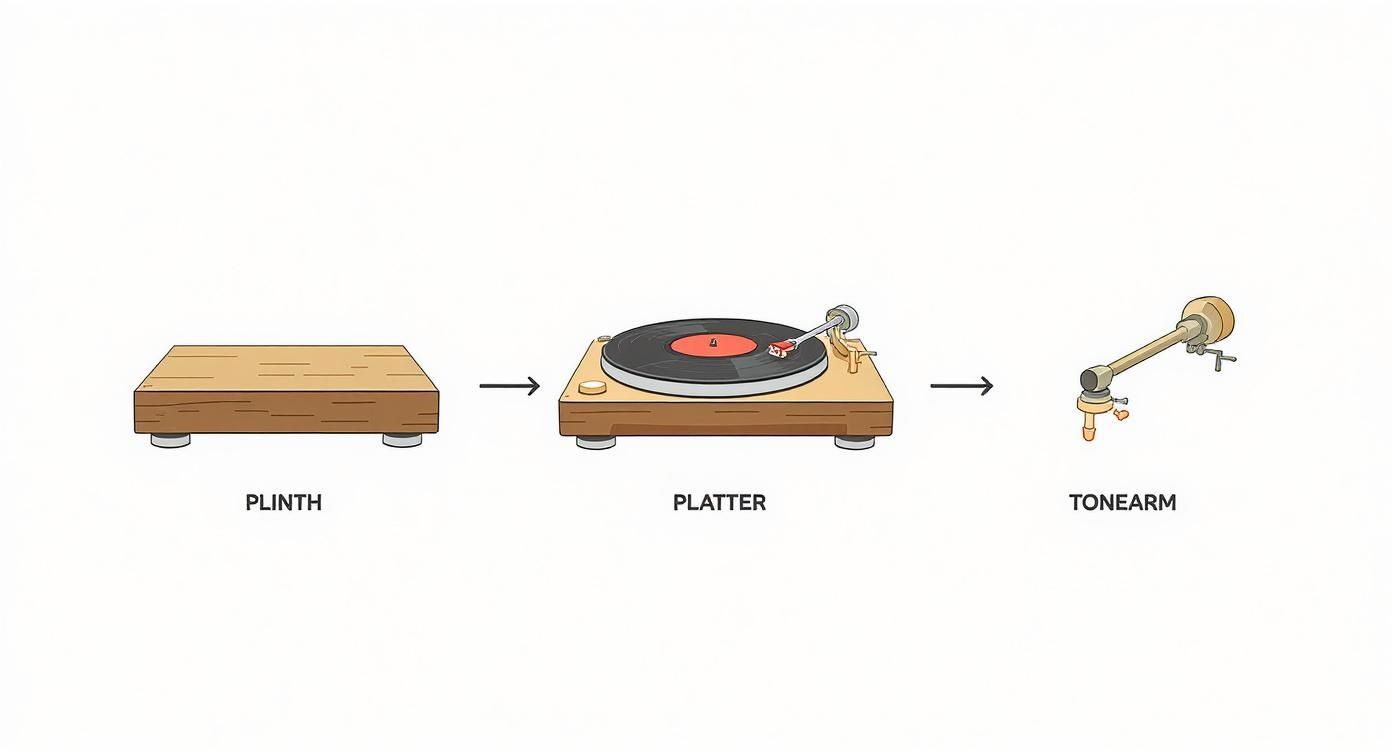
This flow shows just how important each stage is. A stable plinth is the foundation for a perfectly balanced platter, which in turn allows the tonearm to do its job accurately.
The first and most important adjustment you'll make is setting the Vertical Tracking Force (VTF). This is simply the downward pressure the stylus puts on the record groove. If the force is too light, the stylus will skip and mistrack, creating nasty distortion and sibilance. Too heavy, and you're looking at premature wear on both your stylus and your beloved vinyl collection.
Every cartridge has a manufacturer-recommended tracking force, usually somewhere between 1.5 and 2.5 grams. Your job is to hit that target precisely, and the best way to do that is with a stylus force gauge. Digital gauges are cheap and incredibly accurate, making them a no-brainer investment for anyone serious about their records.
Next up is the anti-skate adjustment. As a record spins, physics wants to pull the tonearm toward the center of the platter. The anti-skate mechanism is a clever little feature that applies a tiny bit of outward force to counteract this pull, keeping the stylus perfectly centered in the groove. Getting this right ensures you have a balanced sound between your left and right channels and prevents one side of your stylus from wearing out faster than the other.
A classic trick for setting anti-skate is to use a record with a blank side (or a laserdisc if you have one lying around!). Place the stylus on the blank surface. It should either stay put or drift very slowly toward the center. If it zips inward or outward, you've got some adjusting to do.
Finally, you need to nail the cartridge alignment using a protractor. This tool helps you position the cartridge so the stylus stays as parallel as possible to the record groove from the outer edge to the inner tracks. Proper alignment is the key to minimizing tracking error and distortion, giving you a much cleaner and more detailed sound.
The growing obsession with hands-on audio projects like this is clearly reflected in the market. The household turntables market was valued at around USD 90.4 million in 2024 and is expected to climb to USD 120 million by 2031. This isn't surprising when you see how much people value personalized gear, and modern features like USB and Bluetooth have only broadened the appeal.
Getting these final details just right takes patience, but it’s where all your hard work pays off. Think of it like a musician tuning their instrument before a performance. These calibrations bring your turntable to life, ready to deliver that rich, immersive analog sound you’ve been chasing. For a great look at another high-fidelity audio project, check out how the team behind Kaibo Audio managed their successful campaign.
Jumping into your first DIY turntable kit project is exciting, but it’s totally normal to have a few questions. The idea of assembling precision audio gear might seem a bit daunting, but most of the common hurdles are easy to clear with a little bit of know-how. Let’s tackle some of the things new builders often wonder about.
One of the biggest worries for folks just starting out is whether they need some kind of advanced technical background. People often ask if they need to be an electronics whiz or know how to solder just to get started.
Not always. Many kits aimed at beginners are designed for simple plug-and-play assembly. You won't even need to break out a soldering iron, which makes them perfect for learning the mechanical side of how a turntable works.
On the other hand, more advanced or modular kits will often require some basic soldering for things like connecting those tiny, delicate tonearm wires or wiring up power components. Just be sure to check the kit's skill level before you hit "buy." If it does require soldering, don't sweat it—it's a fantastic skill for any audio hobbyist to pick up, and you can find plenty of cheap practice kits to get the hang of it.
The single most common—and heartbreaking—mistake is damaging the delicate cartridge stylus or cantilever during installation. I've seen it happen. Your best defense is to keep the stylus guard on until the absolute final step of calibration. Think of it as cheap insurance against an accidental slip of the hand.
Another classic pitfall is rushing the tonearm wiring. Those wires are incredibly thin and can snap if you're not careful.
My best advice? Slow down. Work in a well-lit space and follow the instructions to the letter. Patience really is a virtue in the world of DIY audio. It’s the difference between a triumphant first spin and a frustrating pile of parts.
The savings can be pretty significant, especially once you get into mid-to-high-end audio gear. A well-chosen DIY kit can give you the same audio performance as a pre-built turntable that costs 50-75% more. For example, a $500 kit could easily go toe-to-toe with a commercial model in the $800-$900 range.
But the real value goes beyond the initial price tag. You’re also gaining the knowledge to upgrade individual parts—like the cartridge, platter, or tonearm—down the line. This lets you keep improving your setup over time without having to buy a whole new turntable.
This growing community of builders often turns to crowdfunding to bring cool new kits to life. When they do, managing all those backers and making sure everyone gets what they pledged for is a huge job. A creator might think the Kickstarter pledge manager is enough, but it’s really more like Amazon—a broad platform that isn't specialized for this.
That's where a dedicated pledge manager comes in. It’s essential for a smooth post-campaign process. For instance, PledgeBox is free to send the backer survey and only charges 3% of the upsell if there's any. Think of the PledgeBox pledge manager as the Shopify for crowdfunders; it’s a purpose-built tool that helps creators handle surveys, manage add-ons, and keep their community engaged long after the campaign clock runs out.
Ready to launch your own hardware project and need a seamless way to manage your backers from day one? At PledgeBox, we provide the tools to make your crowdfunding journey a success, from pre-launch to fulfillment. Learn more and get started at https://www.pledgebox.com.
The All-in-One Toolkit to Launch, Manage & Scale Your Kickstarter / Indiegogo Campaign