How to Create a Custom Dice Tray for Crowdfunding Success
A complete guide for creators on how to design, manufacture, and sell a custom dice tray. Boost campaign ROI and backer satisfaction with expert strategies.
A complete guide for creators on how to design, manufacture, and sell a custom dice tray. Boost campaign ROI and backer satisfaction with expert strategies.
In a packed crowdfunding space, the little things can make all the difference. A custom dice tray, once a niche item, has become a secret weapon for tabletop game campaigns. It’s a premium, thematic upgrade that makes the whole gaming experience feel more special, and for creators, it can seriously bump up your average pledge.
Let’s be real—tabletop gamers are collectors. They love their accessories. A well-made custom dice tray isn't just a place to roll dice; it's a piece of the game's world that protects your table and keeps your fancy dice from flying everywhere. For a Kickstarter creator, this is a golden opportunity to add a ton of value to your project.
The numbers don't lie. The custom dice tray market has taken off right alongside the massive boom in tabletop gaming. The industry was valued at $18.41 billion in 2025 and is on track to hit $39.14 billion by 2030, growing at an incredible 16.3% CAGR. What does this mean for you? These personalized dice holders are now must-have accessories. You can explore more data on the tabletop gaming market's growth to see just how big this opportunity is.
Seasoned creators know that backers aren't just buying a box with components; they're buying into an experience. A custom dice tray fits perfectly into this mindset by offering:
By offering a custom dice tray as an add-on, you give your backers a simple way to upgrade their pledge and make the game truly their own. It’s an easy win for boosting your campaign’s average pledge without overhauling your core reward tiers.
Here's the key takeaway: a custom dice tray transforms from a simple accessory into a powerful sales tool. It signals to potential backers that you care about the details and are committed to delivering a premium, complete gaming experience.
This isn't just about adding one more thing to your manufacturing checklist; it's a smart campaign move. A fantastic way to offer the dice tray is as a post-campaign upsell through a flexible pledge manager.
This is exactly where a tool like PledgeBox comes in. If Kickstarter's pledge manager is like Amazon, think of PledgeBox's pledge manager as your personal Shopify store. It gives you total control over how you present your add-ons after the campaign.
You can set up your dice tray with great visuals, making it an easy and tempting purchase for backers filling out their survey. And the best part? PledgeBox is free to send the backer survey and only charges 3% of the upsell if there's any. This makes it a completely risk-free way to boost your funding and surprise your backers with a cool upgrade they'll love.
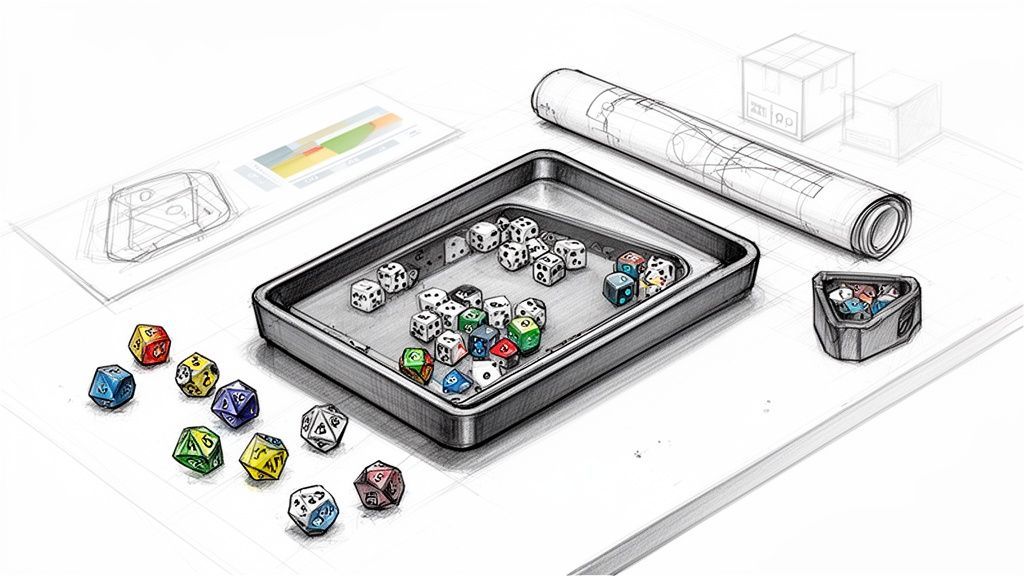
Every great custom dice tray starts as a flicker of an idea. This is where the magic begins, taking your vision from a sketch on a napkin to a real, physical prototype you can hold, test, and show off in your campaign photos. The choices you make at this stage are huge—they'll shape everything from backer excitement to manufacturing costs and the final quality of your product.
First things first, you need to nail down the basics. A dice tray's job is to contain dice rolls and make the game experience better. Since a standard D&D set has seven dice, the tray needs enough room for a good, solid roll without hogging the whole table. A size around 8x8 inch or 8x10 inch is a great, time-tested starting point.
But don't let a simple square box you in. Getting creative with the shape can be a game-changer for backer appeal. Think about a coffin-shaped tray for your horror game, or maybe one that looks like a spaceship’s control panel for a sci-fi adventure. Thematic designs really grab attention.
Beyond the shape, it’s the little details that can turn a nice-to-have add-on into an absolute must-buy. Think about adding features that are both practical and cool.
This diagram really boils down what makes a custom dice tray a winning campaign reward—it's all about hitting that sweet spot between unique appeal, good value, and a great user experience.

A successful product truly lies where unique design, perceived value, and a memorable experience all meet. For a much deeper dive into this process, you should check out our guide on crafting your crowdfunding prototype.
The material you pick for your custom dice tray is going to define its entire look, feel, and price tag. Every option has its pros and cons, so you have to find the right balance between your creative dream and the realities of your budget and production timeline.
Choosing your dice tray material is one of the biggest decisions you'll make. It impacts cost, durability, and the overall impression your product makes on backers. This table breaks down some of the most common options to help you decide what's best for your project.
| Material | Average Cost per Unit | Durability | Customization Options | Best For |
|---|---|---|---|---|
| Wood (Oak, Walnut) | High | High | Excellent for laser engraving, staining, and creating a classic, premium feel. | High-end collector's editions and campaigns with a rustic or fantasy theme. |
| Leather/Faux Leather | Medium-High | Medium | Great for embossing/debossing logos. Offers a quiet rolling surface and a sophisticated look. | Folding "valet" style trays and premium, portable add-ons. |
| Neoprene | Low-Medium | High | Perfect for vibrant, full-color sublimation printing. Lightweight and rollable. | Budget-friendly, highly visual, and portable trays that can be included with the game. |
| Molded Plastic | Low (at scale) | Very High | Nearly unlimited shape and color possibilities. Can be designed with intricate details. | Creators wanting unique, durable, and cost-effective trays for large production runs. |
Each material tells a different story and appeals to a different kind of backer. Whether you go for the classic charm of wood or the endless possibilities of plastic, make sure it aligns with your game's identity.
Wood, for instance, has that timeless, premium feel that’s perfect for laser engraving. Woods like oak, walnut, or even bamboo can make for a stunning and durable product, but keep in mind that they're often heavier and more expensive to produce and ship.
Leather and faux leather offer a sleek look and a wonderfully quiet rolling surface. These are commonly used for those folding "valet" style trays that snap together at the corners, giving you a great mix of quality and portability.
Neoprene is another fantastic option, especially if you want a rollable or foldable tray. It’s light, tough, and you can print vibrant, full-color artwork right onto it, which opens up amazing customization possibilities. Plus, it provides a nice, soft surface for rolling.
Then there’s plastic, which is incredibly versatile. Custom thermoformed dice trays are becoming a massive deal in crowdfunding. As part of a huge thermoformed trays market projected to hit $32.57 billion by 2035, these trays can be molded into literally any shape you can dream up. The custom segment is growing the fastest, which shows that backers are hungry for unique, durable plastic trays designed just for them.
The material you choose is more than just a component; it's a core part of your product's story. A rustic wooden tray tells a different story than a sleek, custom-molded plastic one. Choose the material that best aligns with your game's theme and your backers' expectations.
Once you’ve locked in your design and materials, it’s time to create the digital files your manufacturer will need. For things like laser engraving on wood or printing detailed art on neoprene, you will almost always need to provide vector artwork. Files from programs like Adobe Illustrator (saved as .AI, .EPS, or .SVG) are the gold standard because they can be scaled up or down without getting blurry or pixelated.
Finding a factory willing to make just one prototype can be tough, since many have high minimum order quantities (MOQs). Your best bet is to look for companies that specifically advertise prototyping services or have experience working with crowdfunding creators. A high-quality prototype is absolutely non-negotiable—it's what you’ll use for all your campaign photos and videos, not to mention for final quality checks before you pull the trigger on a full production run.

Okay, your prototype looks amazing and the design files are locked in. Now comes the part that can make or break your project: finding a manufacturer. This isn't just about finding someone to make your stuff; it's about finding a partner. Your choice here will directly impact your product quality, timeline, and a huge chunk of your budget.
The good news? The vetting process is pretty much the same whether you're looking at a factory overseas or a workshop down the street.
Your search can start on massive platforms like Alibaba for overseas options, or with a simple Google search like "custom woodworking" or "thermoforming services" to find local talent. But honestly, one of the best sources is your own network. Ask other creators for recommendations—a trusted referral can save you a world of headaches.
Once your design is totally finalized, partnering with reliable manufacturing solutions is the next critical step. I always suggest building a shortlist of 5-10 potential manufacturers. This gives you enough variety to compare quotes and capabilities without getting completely swamped.
If you want a factory to take you seriously, you need to send them a detailed Request for Quote (RFQ). A lazy, one-line email will get you a vague response at best, or radio silence at worst. Think of your RFQ as a mini-bible for your project.
Your RFQ package should include:
Putting in this effort upfront shows you're a professional. It signals to factories that you've done your homework, which they appreciate, and it gets you the accurate numbers you need, faster.
As the quotes roll in, you'll see the term Minimum Order Quantity (MOQ) everywhere. This is simply the smallest order a factory will accept for a production run. For a custom dice tray, MOQs can be as low as 100 units for something simple like a neoprene mat, or jump to over 1,000 units for a more complex injection-molded design.
A high MOQ isn't necessarily a dealbreaker if the per-unit price is right, but you need to be brutally honest with yourself about whether you can actually sell that many.
Now, before you even think about wiring money for a full production run, you must get a pre-production sample (PPS). This isn't your handmade prototype. The PPS is the first official unit off the real assembly line, using the final tools and materials. It's your last chance to catch any mistakes with color, finish, or construction before they make thousands of them.
Never, ever skip the pre-production sample. Approving a PPS based on photos alone is a huge risk. Always have the physical sample shipped to you for a hands-on inspection. This single step can save you from a warehouse full of defective products.
So you've got your quotes, the sample looks perfect, and you're ready to pick a winner. It's time for the final interview. You're about to entrust this company with your backers' money, so treat it seriously.
Here are the questions I always ask:
Building a strong, communicative relationship with your manufacturer is the secret to a smooth campaign. They are your most important partner in bringing your awesome custom dice tray from a great idea to a real product in your backers' hands.

You’ve locked in your design and found a manufacturer you trust. Now comes the moment of truth: pricing. I've seen countless successful campaigns stumble here, turning a funding win into a financial nightmare. To avoid that, you need to understand the true cost of your custom dice tray.
This isn't just the number your manufacturer quoted you. The real figure to base everything on is the landed cost—the total expense to get a single dice tray from the factory floor all the way to your fulfillment center.
Your landed cost is a sum of three critical parts: the manufacturing cost per unit, the freight cost per unit, and any import duties or taxes. Miss one, and your profit margin vanishes.
Let's walk through a real-world scenario. Say your manufacturer quotes you $5.00 per dice tray for an order of 1,000 units. That’s our starting point.
When you add it all up, your total outlay is $5,000 + $1,500 + $250 = $6,750. Now, divide that total by your quantity to find your landed cost per unit: $6,750 / 1,000 units = $6.75 per tray.
That $6.75 is your magic number. It's the cost you must use for your pricing strategy, not the initial $5.00 quote.
Once you have your true cost, you can figure out how to price your dice tray. You’ll hear about the 3x to 5x Keystone markup, which is a solid retail rule of thumb, but crowdfunding is its own unique animal. You have to find that sweet spot between profitability and irresistible backer value.
For a tray that costs you $6.75, a price tag in the $20 - $25 range is a pretty good place to start. This gives you a healthy enough margin to cover platform fees, marketing, and the inevitable unexpected hiccup. For a deeper dive, this is an excellent guide on how to price products for retail effectively.
From my experience, the single most effective way to sell a custom dice tray is as a post-campaign add-on inside your pledge manager. Why? It keeps your main campaign page clean and focused on your core product, then uses the tray to seriously bump up your average pledge value later on.
Think of your pledge manager as your personal storefront. If Kickstarter's pledge manager is like Amazon, a pledge manager like PledgeBox is your Shopify store. It lets backers browse and add tempting extras like a dice tray to their order.
This works so well because a flexible pledge manager presents your add-ons in a clean, visual, shop-like environment—a world away from Kickstarter's basic survey. Better yet, a service like PledgeBox is free to send your backer survey and only charges 3% on the upsell if there's any. It's a no-risk way to boost your funding.
Packaging is the final, crucial piece of the profit puzzle. It has two jobs: protecting the product and creating a great unboxing experience. This is your first physical handshake with your backer—make it a good one.
Here are the typical options you'll be choosing from:
Remember this: in fulfillment, weight is your enemy. An extra few ounces from a fancy box can easily tip your package into a more expensive shipping tier. Multiply that extra cost across thousands of backers, and you’ve just erased a huge chunk of your profit. Always, always get final, packaged weights from your manufacturer before you set your shipping prices.
Don't make the mistake of thinking your campaign is over when the timer hits zero. Some of your biggest funding gains can happen after the campaign officially ends. This post-campaign phase, handled through a pledge manager, is your best chance to boost revenue by offering fantastic add-ons, like your brand-new custom dice tray.
Think of it this way: Kickstarter's pledge manager is a bit like Amazon. It gets the job done and everyone knows it, but your branding options are limited. A dedicated pledge manager like PledgeBox is more like having your own Shopify store—it gives you total control to create a powerful, branded experience built from the ground up to drive upsells.
Here’s a quick look at how the PledgeBox dashboard organizes your campaign data, giving you a clear view of your progress.
This centralized hub is so powerful because it shows you exactly how much extra funding you're pulling in from add-ons and late pledges, all in one spot.
At its core, a pledge manager’s job is to collect shipping info and final payments. But the real magic is its ability to make upselling feel natural and exciting. Right after a campaign, backers are still buzzing with excitement for your project. This is the perfect moment to show them that beautiful custom dice tray they might have skipped over during the initial pledge.
Unlike the basic surveys on crowdfunding platforms, a dedicated tool turns this process into a curated shopping trip. You can use high-quality photos, compelling descriptions, and even special bundles that weren't available during the live campaign. For creators, this is a golden opportunity. A well-run pledge manager strategy can boost a campaign's total funding by 10-20%.
Getting your pledge manager ready to sell your dice tray is simple, but you need a bit of strategy. The goal is to make it an irresistible add-on for every backer who opens their survey.
First, you'll create a new "item" for your dice tray inside the pledge manager. This is where you’ll plug in all the key details:
Next, it’s all about presentation. Upload several high-resolution photos showing the dice tray from different angles, with dice in it, and next to your main game. Write a short, punchy description that sells the benefits—the premium feel, the thematic art, and the simple joy of keeping your dice contained.
The key is to shift the backer's mindset from "filling out a form" to "shopping for cool extras." A powerful pledge manager enables this by providing a visually appealing, intuitive interface that encourages browsing and impulse buys.
One of the slickest features of a good pledge manager is the ability to segment your offers. This just means you can show different add-ons or special deals to different groups of backers. For example, you could offer an exclusive discount on the dice tray just for your "All-In" or early bird backers as a special thank you.
This kind of personalization makes backers feel seen and can seriously increase your conversion rate on upsells. You could also create bundles, like offering the dice tray and a set of custom dice together for a slightly better price to encourage a higher spend.
The financial model of a platform like PledgeBox makes this a no-brainer. PledgeBox is free to send the backer survey and only charges a 3% fee on new funds raised from these upsells if there's any. You can set up your entire add-on store with zero upfront cost, paying only a tiny slice of the extra money you bring in. It's a risk-free way to make your project more profitable. You can learn more about how the PledgeBox pledge manager works and its features. This approach not only helps you raise more funds but also ensures you collect the right shipping fees, protecting your margins and setting you up for smooth fulfillment.
Getting your beautiful custom dice tray into your backers' hands is the final boss of your crowdfunding journey. This is where a successful campaign can either soar across the finish line or crash and burn. A profitable project can quickly become a logistical nightmare if you don't nail this last step.
Your first big decision is whether to handle fulfillment yourself or hire a third-party logistics (3PL) company. Going the DIY route gives you complete control and can save money on smaller campaigns, but be warned: it's a massive time sink. A 3PL, on the other hand, lives and breathes this stuff, freeing you up to start planning your next big idea.
No matter which path you take, you absolutely need clean, accurate, and exportable data. This is where your choice of pledge manager becomes one of the most important decisions you'll make. Trust me, trying to manage hundreds of orders from a spreadsheet is a recipe for disaster. One tiny typo could mean a lost package and a costly reshipment on your dime.
This is exactly why tools like PledgeBox are so invaluable. It’s built to prevent these kinds of headaches. Backers enter their own details, and the system uses Google Maps-powered address validation to catch mistakes before they turn into expensive shipping errors.
When it's time to ship, PledgeBox lets you export all your order data in a clean format that’s ready for your 3PL or for printing your own labels. This simple data transfer is an absolute lifesaver, cutting out hours of manual entry and dramatically reducing the chance of human error. If you want to dive deeper into this, our guide on crowdfunding fulfillment services is a great place to start.
Shipping your dice tray internationally adds a whole new layer of complexity. You have to get two things right: HS Codes and postage calculations.
An HS (Harmonized System) code is a universal number that customs officials around the world use to classify products. For a wooden dice tray, that code might be something like 4420.90, but a plastic one would have a different code entirely. Getting this wrong can cause major customs delays or, even worse, leave your backers with surprise fees.
Calculating international postage accurately is just as crucial. Shipping rates are constantly in flux and vary wildly depending on the destination country and the weight of the package.
Here’s a critical pro-tip: A good pledge manager should do the heavy lifting for you. In PledgeBox, you can set up shipping rates for different zones based on weight. When a backer fills out their survey, the system automatically calculates the exact shipping fee for their specific order and location. This ensures you collect precisely what you need to cover costs.
This automated process takes the guesswork out of shipping and protects your profit margins. By managing your data properly and calculating shipping correctly, you can conquer the final boss of crowdfunding and ensure a smooth, low-stress fulfillment phase. The result? Happy backers who love their new dice tray and can't wait to see what you create next.
Even with a perfect plan, creating a custom dice tray for your campaign will throw a few curveballs your way. From manufacturing minimums to shipping surprises, let's walk through some of the most common questions creators have so you can sidestep the usual headaches.
Your Minimum Order Quantity (MOQ) is going to swing wildly depending on the material and how fancy your design is. For simpler stuff like felt or snap-together neoprene trays, you can often find manufacturers happy to start with an MOQ as low as 100-250 units.
But if you’re dreaming up custom-molded plastic or a beautifully engraved wooden tray, you should expect that number to jump. Most manufacturers will want a commitment in the 500-1,000 unit range for more complex items. My advice? Always shop around and get multiple quotes—some factories that frequently work with crowdfunding creators are more flexible on their terms.
Don't guess. First things first, you absolutely need the final, packaged weight and dimensions for a single dice tray directly from your manufacturer. With that data, you can start getting real shipping rate estimates for your key regions (think USA, EU, UK, Canada, Australia).
This is where a good pledge manager becomes your best friend. A tool like PledgeBox handles the heavy lifting by automatically calculating and charging each backer the correct shipping fee based on their exact location and the total weight of everything in their cart. This single feature can save you from accidentally losing a huge chunk of your funds to miscalculated postage.
For almost every campaign I’ve seen, making the dice tray an add-on is the smartest move. It keeps your main reward tiers clean and focused on your core product—the game itself. The tray then becomes a fantastic way to boost your average pledge amount. You can always bundle it into a high-level "All-In" tier for your super-backers, too.
A pledge manager gives you a second chance to sell the tray to every single backer after the campaign ends. You’ll be surprised how many people decide they want it once the funding frenzy is over, and this post-campaign upsell often captures more sales than relying on them to grab it during the live campaign.
This is a really important point. Kickstarter’s built-in survey is just a simple form to collect addresses. That’s it. A real pledge manager like PledgeBox, on the other hand, gives your backers a branded, easy-to-use storefront where they can confirm their pledge, upgrade to a higher tier, and shop for more add-ons.
Here’s a good way to think about it: Kickstarter's pledge manager is like Amazon—functional, but that's all. The PledgeBox pledge manager is like having your own mini Shopify store built just for your backers—it’s flexible, powerful, and designed to generate more revenue. Best of all, PledgeBox is free to send the backer survey and only charges 3% of the upsell if there's any. It's a no-risk way to seriously increase your final funding total.
Ready to streamline your post-campaign process and boost your funding with powerful upsells? Get started with PledgeBox today and see how easy it can be to manage your backers and maximize your success. Learn more and sign up at PledgeBox.com.
The All-in-One Toolkit to Launch, Manage & Scale Your Kickstarter / Indiegogo Campaign