Your Guide to a Successful 3D Printers Kickstarter
Launch a successful 3D printers Kickstarter with our guide. Learn pre-launch strategy, campaign optimization, manufacturing, and post-campaign growth.
Launch a successful 3D printers Kickstarter with our guide. Learn pre-launch strategy, campaign optimization, manufacturing, and post-campaign growth.
Launching a 3D printers Kickstarter is a wild ride, but the truth is, the race is often won or lost long before you hit that big green "launch" button. The secret to those campaigns that blow past their funding goal in a matter of hours? It's all in the methodical, strategic groundwork laid in the months leading up to day one.
Think of the pre-launch phase as turning a great idea into an unstoppable force. It's not just about getting your prototype working; it's about building a genuine community of people who are counting down the days until they can back you. This is your window to validate your concept, fine-tune your messaging, and build the critical mass needed for a huge launch.
This initial stage sets the entire tone for your campaign. A strong start creates a powerful feedback loop of excitement and social proof, which naturally pulls in more backers and media attention. If you skip this part, you risk launching to the sound of crickets, making that climb to your funding goal a whole lot steeper.
Before you sink a single dollar into marketing, you need to be absolutely sure people actually want what you’re building. Your assumptions about your printer’s "killer features" might not be what the community is actually looking for.
Go to the places your target audience already hangs out. Subreddits like r/3Dprinting or niche Facebook groups are absolute goldmines for raw, unfiltered feedback. Don't just show up and spam your link; become part of the conversation. Ask questions, share your progress, and really listen to the pain points people have with their current 3D printers.
Here are a few things you can do:
This hands-on approach does more than just help you build a better product. It creates your first wave of evangelists—people who feel like they've been a part of the journey from the beginning.
Your email list is, without a doubt, your single most valuable pre-launch asset. These aren't just names in a database; these are your future Day One backers. The whole point is to build a list of people who are genuinely hyped for your project and ready to pledge the minute you go live.
A powerful email list is the engine of a successful Kickstarter launch. Aiming for 5,000 to 10,000 highly engaged subscribers is a strong benchmark that can often lead to getting fully funded within the first 24-48 hours.
Set up a simple, clean landing page that clearly spells out your printer's value and has an obvious email sign-up form. Then, drive traffic there from your community engagement, content, and maybe some targeted ads. Keep this list warm by sending exclusive updates, behind-the-scenes content, and hints about the special early-bird deals they'll get for being on the inside track. For a more detailed playbook, check out our guide on how to build a list of potential backers before your Kickstarter campaign launches.
Here's a quick checklist to keep you on track during this crucial phase.
This table breaks down the essential tasks to tackle before you launch. Nailing these actions will give your campaign the best possible chance of success right out of the gate.
| Phase | Key Action | Success Metric |
|---|---|---|
| Concept Validation | Engage in online forums (e.g., Reddit) and conduct in-person demos. | Refined USP based on direct user feedback. |
| Audience Building | Create a landing page and drive traffic to build a high-intent email list. | 5,000+ engaged email subscribers before launch day. |
| Story & Goal | Develop a compelling narrative and calculate a realistic minimum funding goal. | A clear, emotionally resonant story and a data-backed goal. |
Completing these steps isn't just about checking boxes; it's about building a solid foundation that can support massive growth once the campaign is live.
Your Kickstarter campaign isn't just selling a piece of hardware; it's inviting people to join you on a mission. Why did you create this printer? What frustration did you have that pushed you to build a better solution? Your story needs to be authentic and create an emotional connection with your backers.
At the same time, your funding goal has to be rooted in reality. Do the math. Calculate the absolute bare minimum you need to cover manufacturing, logistics, and all the associated fees. A goal that's too high can scare off potential backers, but one that's too low might make people wonder if you've really thought it through.
The history of 3D printers on Kickstarter is filled with incredible examples of what's possible when you build a community first. The Peachy Printer campaign, for example, aimed for a modest CA$50,000 goal back in 2013. They ended up raising an astonishing CA$651,091 from over 4,400 backers. Their 1,202% funding success proved there was a huge appetite for affordable, innovative printing tech. By focusing on these pre-launch fundamentals, you're setting the stage to create your own success story.
After months of building an audience and hyping your launch, your Kickstarter page is where the magic happens. Think of it as your digital storefront, your sales pitch, and your reputation test all rolled into one. A killer page doesn’t just list specs; it builds trust, sparks excitement, and nudges a curious browser into becoming a committed backer for your 3d printers kickstarter project.
Ultimately, your page has one job: turn visitors into backers. Understanding some fundamental strategies to increase website conversions is a huge leg up here. It’s a mix of art and science—you need compelling storytelling backed by clear, undeniable proof of what your printer can do. Every single element, from the main title down to the FAQ, has to work together to answer a backer's biggest question: "Why should I trust you with my money?"
You’ve got seconds—literally seconds—to grab someone's attention when they land on your page. Your headline and campaign video are the one-two punch that decides if they keep scrolling or bounce.
Your headline needs to be punchy and benefit-focused. Don't just say "The Model X 3D Printer." Go for something like, "Model X: Print Flawless Prototypes 2x Faster." Right away, people know what’s in it for them. Then, your video brings that promise to life. A great campaign video usually hits these points:
A quick tip: don't overproduce your video. Authenticity often beats a slick, corporate ad. Genuine passion for your product, paired with clear demonstrations, is a winning formula.
Okay, you’ve hooked them. Now the rest of the page needs to deliver the goods and convince a tech-savvy audience you’re the real deal. Lay out the information in a logical flow, using clear headings, GIFs of the printer working, and high-res images. Remember the golden rule: show, don't just tell. Instead of saying your printer has "high precision," show a macro shot of a perfectly printed miniature with every tiny detail visible.
Be completely transparent about technical specs, what materials it can handle, and the software workflow. It's also smart to acknowledge potential risks and lay out your manufacturing plan. This kind of honesty shows you’ve thought through the whole process and are ready for bumps in the road, which builds massive credibility with experienced backers. For a deeper dive, check out these essential Kickstarter campaign page design tips to make sure you're hitting every mark.
Your reward tiers are the core of the transaction. Keep them simple, appealing, and structured to nudge your average pledge value upwards.
Stretch goals are an incredible tool for keeping the momentum going after you hit your initial funding target. But a word of caution: don't overcomplicate your production. Good stretch goals are often digital rewards (like a library of exclusive 3D models) or simple cosmetic changes (like a new color option), not complex hardware tweaks that could lead to delays. The goal is to keep your community fired up and engaged from start to finish.
Hitting your Kickstarter funding goal is an incredible feeling, but it’s just the starting gun. The real marathon begins now, shifting from a single prototype to full-scale production. This is the exact point where so many promising 3D printer Kickstarter campaigns fall apart.
Believe me, turning a clever design into thousands of reliable, high-quality machines is a totally different ballgame. It demands a relentless focus on manufacturing, logistics, and quality control.
Success here comes down to foresight. You have to anticipate the choke points, from sourcing stepper motors that don’t fail to making sure every single extruder is calibrated just right. Cutting corners at this stage doesn’t just cause delays; it can mean shipping a dud product, killing your brand’s reputation before it even has a chance to grow.
Picking the factory that will build your 3D printer is one of the most important decisions you'll make. Think of it as a long-term partnership, not a one-off transaction. You need to start this search months before your campaign even wraps up.
Look for manufacturers who have deep experience with consumer electronics or, even better, similar CNC machinery. Don’t just trade emails. If you can swing it, get on a plane and visit their facility. A clean, organized factory floor is a great sign; a chaotic one is a massive red flag.
Once you have a shortlist, dig deeper:
Your manufacturing partner should feel like an extension of your own team. You want someone who is transparent about what they can and can’t do, and who flags potential problems proactively instead of waiting for you to find them.
For many 3D printer campaigns, parts and production will span multiple countries. Nailing down your supply chain is absolutely crucial to avoiding expensive delays. To really get your head around all the moving parts, this complete international supply chain management guide is an invaluable resource.
You absolutely cannot be hands-off with quality control (QC). Just trusting your manufacturer to "get it right" is a recipe for disaster. You need to define exactly what "quality" means for your printer and build a system to enforce it at every single stage.
A good QC plan isn't a single checkpoint; it's a series of them. It starts the moment raw materials arrive at the factory and doesn't end until the final product is sealed in its box.
This obsessive attention to detail is what separates the winners from the horror stories. In 2023, Anker's sub-brand eufyMake launched the E1 UV 3D printer and raised an unbelievable $46 million on Kickstarter. A huge part of that success was Anker’s existing reputation for quality—a reputation built on ironclad manufacturing and QC processes. To see what’s possible when production is done right, read more about their record-breaking 3D printer campaign. This is the kind of execution that turns a one-hit wonder into a lasting brand.
When the campaign clock hits zero and the confetti settles, you've officially moved from fundraising to operations. This post-campaign period is where your relationship with backers truly begins, and managing their expectations, data, and orders efficiently is critical for a successful 3d printers kickstarter delivery. This is precisely where a dedicated pledge manager becomes your most valuable tool.
You could use Kickstarter's native survey tool, but it's a bit like a one-size-fits-all solution. A dedicated pledge manager, on the other hand, gives you far more control and flexibility.
Think of the Kickstarter pledge manager like Amazon—it’s simple and functional for basic transactions. A specialized tool like PledgeBox, however, is like Shopify—it empowers you to create a customized post-campaign storefront, offering a richer experience for backers and more opportunities for you.
This distinction is crucial. With a 3D printer campaign, you're not just sending out one simple product. You have different reward tiers, potential add-ons, and complex global shipping to manage. A robust pledge manager is built to handle this complexity with ease.
The right tool doesn't just collect addresses; it helps you organize rewards, calculate precise shipping costs after the campaign, and, most importantly, generate additional revenue through strategic upsells. This is where you can offer backers last-minute deals on items that complement their new 3D printer.
This is a key advantage of PledgeBox. It lets you set up a seamless survey experience where backers confirm their pledge, provide shipping details, and browse a curated selection of add-ons. You could offer things like:
This process turns a simple survey into a powerful revenue-boosting opportunity.
One of the biggest hesitations creators have is the cost of post-campaign software. This is where PledgeBox's model really stands out. PledgeBox is free to use for sending your backer surveys. You can collect all the essential information you need without any upfront cost.
The platform only charges a small 3% fee on the funds you raise from upsells. This means it's a completely risk-free way to increase your total funding. If you don't sell any add-ons, you don't pay anything for the survey service. This aligns the platform's success directly with your own, making it a powerful and accessible choice for creators of any size.
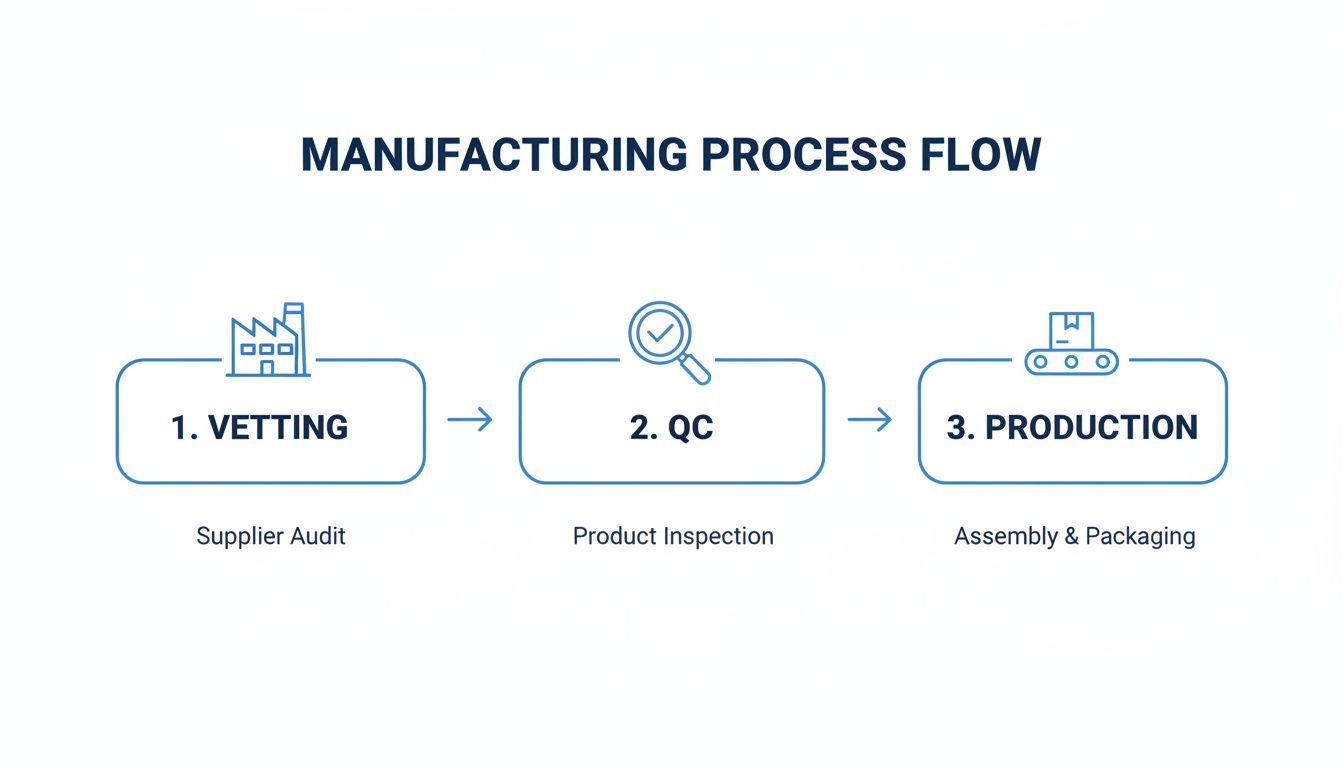
This visual shows the basic flow from vetting partners to final production, a process funded by both your campaign and any post-campaign upsells you secure. By effectively managing this post-campaign phase, you ensure you have the capital needed to navigate manufacturing smoothly.
A smooth post-campaign experience is just as important as the campaign itself. A confusing or clunky survey process can lead to frustration and delays. A good pledge manager provides a clean, mobile-friendly interface that makes it simple for backers to complete their surveys quickly.
A clear and intuitive dashboard is key. This is the kind of professional interface that builds backer confidence and makes managing thousands of orders straightforward. A polished and user-friendly system reflects well on your brand and keeps your community happy as they await their 3D printer.
Shipping thousands of complex hardware units across the globe is the final boss of any 3d printers kickstarter campaign. Let's be blunt: getting this wrong can lead to catastrophic delays, furious backers, and budget overruns that will absolutely sink your company. A solid fulfillment strategy isn't just about slapping labels on boxes; it's a detailed plan for navigating customs, mastering costs, and delivering a fantastic final experience.
The moment a backer unboxes their printer is the climax of their entire journey with you. A bashed-in box, a surprise customs bill, or a six-month delay can poison an otherwise perfect campaign. You have to plan for these logistical nightmares from day one. It's non-negotiable.
One of the most common—and deadly—mistakes creators make is underestimating shipping costs. A 3D printer isn't a t-shirt. It's big, it's heavy, and it's fragile, which means its volumetric weight is a huge cost factor. You absolutely must get real quotes for every single region you plan to ship to before you even think about hitting "launch."
On top of that, international backers will face Value-Added Tax (VAT) or Goods and Services Tax (GST). If you ignore these, their printers will get stuck in customs until they pay a hefty, unexpected fee. Trust me, they won't be happy.
Be upfront about these costs on your campaign page. It might feel scary to display high shipping fees, but it builds trust and prevents a massive backlash later. The best approach is to use a pledge manager after the campaign to collect precise shipping and tax payments based on each backer's exact location. This ensures maximum accuracy and fairness.
When it's time to ship, you have two main options: do it yourself or hire a professional.
For almost any hardware project, partnering with a 3PL that knows the crowdfunding world is the smartest move you can make. They can often secure better shipping rates and navigate the labyrinth of international fulfillment far more effectively than a small startup ever could.
Choosing the right 3PL is a decision that can make or break your post-campaign experience. Don't just pick the cheapest option. Vet potential partners on their track record with Kickstarter campaigns, their software integrations, and their global warehouse network. To help you navigate this crucial choice, check out the valuable insights in this guide on how to pick the right shipping vendor for your crowdfunding campaign.
Your packaging is just as critical. That 3D printer is going to be thrown, dropped, and stacked on its journey. Invest in custom-designed, high-density foam inserts that immobilize the printer and shield sensitive parts like the gantry and print head. Seriously, run drop tests from different heights and angles to see if your packaging can survive the abuse. A few extra dollars on protective packaging can save you thousands in returns and replacements, protecting both your bottom line and your reputation.
Launching complex hardware like a 3D printer on Kickstarter can feel like navigating a minefield. You’ve poured countless hours into perfecting your prototype and building a community, but a few nagging questions can still keep you up at night. This is where we clear the air.
Let's dive into the most common questions we see from creators. Think of this as your go-to FAQ, designed to help you dodge common pitfalls and make smart decisions as you get ready to launch and deliver your machine.
This is the million-dollar question—sometimes literally. How much a 3D printer can raise on Kickstarter swings wildly depending on your printer’s unique features, the size of your audience before you launch, and how well you market it.
While a few campaigns have hit astronomical figures, you need to keep your expectations grounded. Many solid, well-run projects successfully pull in anywhere from $100,000 to over $1 million. Your funding goal should be the bare minimum you need to cover manufacturing, fees, and initial shipping—not a pie-in-the-sky sales target. A realistic goal is an achievable one, and hitting it fast builds the momentum and social proof you need.
The real key to a massive raise is what you do before the campaign. An engaged email list of 10,000+ subscribers is a fantastic sign that you’re on track for a six-figure launch. Getting early reviews from press and influencers can also throw gasoline on the fire.
A stunning example of what's possible is the Snapmaker U1 3D printer campaign. It became a legend in Kickstarter history, raising over $20 million from more than 20,000 backers. Their success wasn't an accident. It was built on the trust they earned from two previous successful projects, a massive beta testing program that actually listened to backer feedback, and smart partnerships. It just goes to show how a solid reputation and a deeply engaged community can lead to mind-blowing results. Check out the full story on Snapmaker's historic campaign.
For any hardware project, the scariest risks always boil down to three things: manufacturing, quality control, and logistics. These are the hurdles that can turn a crowdfunding celebration into a delivery nightmare.
Things can go wrong anywhere. Your go-to supplier for stepper motors might suddenly have a shortage. A critical bug could pop up in the firmware during the first production run. The cost of tooling could end up way higher than you budgeted. Any one of these can delay your delivery by months and really test the patience of your backers.
Here’s a quick breakdown of what to watch out for:
The best defense is a good offense. Have backup suppliers lined up for your most important parts, go to the factory for QC checks yourself (or hire someone you trust), and partner with a fulfillment company that knows what they're doing. Most importantly, talk to your backers constantly. Being honest about delays is always, always better than radio silence.
After your campaign wraps up, Kickstarter gives you a basic survey tool to collect backer info. If you're selling something simple like a t-shirt or a book, it's probably fine. But for a complex hardware launch like a 3D printer, sticking with only Kickstarter’s tool is a huge missed opportunity.
A dedicated pledge manager gives you the power and flexibility you need to run a smooth post-campaign operation. It turns the simple survey into a full-blown, custom storefront just for your backers.
Here's an easy way to think about it: Kickstarter's pledge manager is like Amazon—a simple, one-size-fits-all checkout. A pledge manager like PledgeBox is more like Shopify—it gives you a powerful, customizable platform to manage your "store" after the campaign ends. This lets you handle complicated reward tiers, charge for shipping accurately, and—this is the big one—upsell your backers on awesome add-ons.
That upsell feature alone can bump your total funding by 10-20%. You can offer extra filament, hardened nozzles, or flexible build plates. A lot of backers who were on the fence during the campaign will happily grab these extras when you give them a second chance.
Maybe the best part is the price. PledgeBox is free to send the backer survey, so you can collect all your essential shipping and reward info at no cost. They only charge 3% on the revenue from upsells, if there's any. This makes it a totally risk-free way to raise more money and make your life a whole lot easier.
Ready to take control of your post-campaign process and boost your revenue without the risk? PledgeBox provides all the tools you need, from powerful surveys and upsell features to seamless fulfillment integrations. Learn more and get started for free at https://www.pledgebox.com.
The All-in-One Toolkit to Launch, Manage & Scale Your Kickstarter / Indiegogo Campaign